Installation
- Install the IPS Order Wishlist package in Plugins → Add New, then activate it.
- Make sure WooCommerce is active.
- Open IPS → Wishlist in WordPress administration.
- Review Settings → Base, then choose who can use wishlists.
- Open Settings → Wishlist page and select the page that contains the wishlist shortcode.
- Save the settings and test the customer flow in a private browser window.
Use a staging site and take a current backup before changing a live shop. Theme and cache behavior can affect the position and appearance of customer-facing controls.
Quick start
1. Prepare the wishlist page
Create or choose a normal WordPress page, add the following shortcode, and select that page under Settings → Wishlist page.
[ips_wooorderwishlist_wishlist]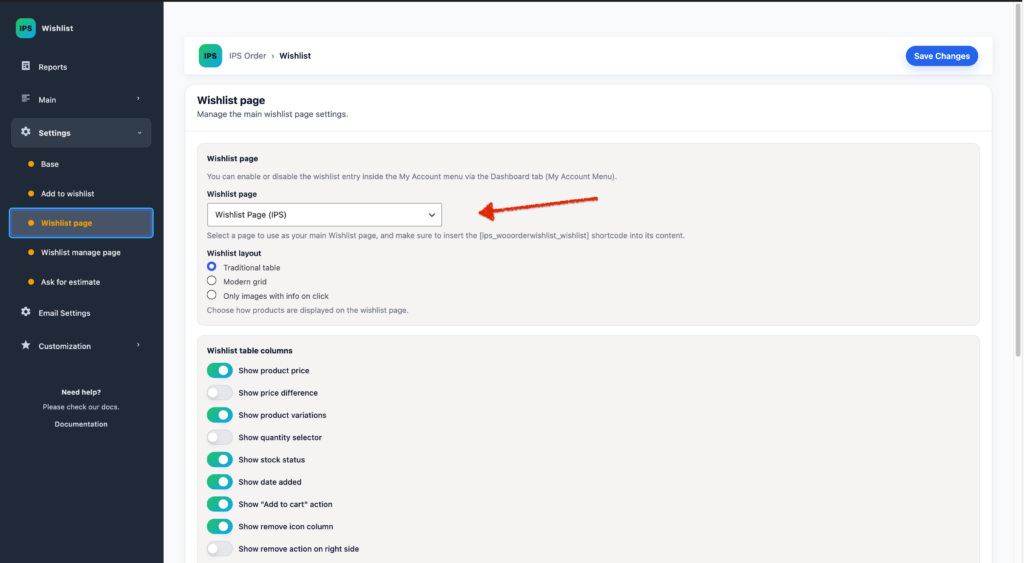
2. Enable product controls
Under Settings → Add to wishlist, enable the product-loop control if required and choose its position. Select a position for the product page as well.
3. Test the complete flow
- Add a product from the shop page.
- Add a product variation from its product page, if the shop uses variations.
- Open the wishlist page and My Account entry.
- Remove an item and add another item to the cart.
- Open a shared link in a logged-out browser session.